Pages

Wednesday, April 30, 2014

We can do it Wednesday!: Fruit for Dessert Update 2

So my second week of trying to limit my dessert to fruit went much better than last week. There were two things I did this past week that made a big difference:

1) Waiting at least an hour after dinner to eat. This helped a lot. I found that immediately after dinner I always crave something sweet and delicious, like chocolate, and I think this is just out of habit. If that is the case, this is hopefully a habit I can break. Also, the problem with eating right after dinner is that my food hasn’t digested fully and I can’t accurately gauge how full I am, so I end up eating too much. If I can just power through the first hour after dinner either by going to the gym or distracting myself with TV or chores, when I eat later I’m not really craving sweet things and I eat less because I feel fuller by then.

2) Telling someone close to me about my goal – Having Zach know about my plan was a huge help. Many times I would want to eat some peanut butter out of the jar, but I’d think twice about it because I knew Zach would look at me an awkward “I know you set a goal to only eat fruit after dinner and that’s not fruit, but I’m not going to say anything because you’ll get mad at me for calling you fat” look. To avoid the awkwardness I’d just pass on the peanut butter since I realized I wasn’t really hungry anyway. I think the key is to tell someone who you’re around a lot though (so they can be there right when you’re about to stray) and who is supportive.

I’m going to continue with the fruit thing for as long as I can (mainly on weekdays though). And the one hour rule turned out to be great, so I’m going to keep that in place whether I’m planning to eat chocolate or fruit.


Since I was successful with last week’s goal, I’m feeling pretty ambitious and am going to go with a super hard goal for this week: no TV. Zach and I don’t subscribe to cable, but that doesn’t keep me from watching Hulu and Netflix like it’s my job. Last week I lost my iPad (which I mainly use as a mini TV while I’m doing chores around the house) so I figured since I don’t have the iPad drawing me to watch every single episode of strangling addicting TV series, now would be a good week to try life without TV. I’m hoping to supplement my TV watching time with book reading time and home organizing time. We’ll see how it goes.

Tuesday, April 29, 2014

Townhome Tuesday: Stick-on Wall Clock

The first Christmas after Zach and I moved into our town home his sister got us a really cute stick-on wall clock from Chiasso. Here's the one she got us:


We loved the clock because it matched our style and was very simple to assemble (you just peel off the backing and each piece adheres to the wall like a sticker) but we held on to it for over a year before putting it up because we knew once we assembled it it would have to stay in the same place for good.

So after we got our new living room furniture and painted our walls, we revisited the clock and found the perfect place for it next to our entertainment unit. I still hesitated with sticking the clock directly to the wall, so we came up with a great idea to stick it onto clear plastic and then mount that piece to the wall.

I found a square piece of plastic at Home Depot that was a perfect size for the clock, and we ordered stand-off wall mounts online. Instead of sticking the pieces to the wall we stuck them to the plastic. Then we drilled 4 holes into the plastic for the wall mounts, screwed the mounting into the wall, and then we were done. It was super easy and I think this change makes the clock look even better. It also makes the whole thing portable so we can move it to another area of the house if we need to. Check it out:


Friday, April 25, 2014

Food Friday: Vegan Fruit Pizza

When I was growing up my mom’s signature dessert to bring to parties was fruit pizza. And since it was so easy to make, she usually let me put it together, which made me love the dish even more. All I had to do was get one of those Pillsbury rolls of chocolate chip cookie dough and bake it on a large round pan for the crust part of the pizza. Then I whipped up instant vanilla pudding and added that as the sauce, and topped with chopped fruit.

Zach and I were asked to bring a vegan dessert to a dinner party last week, so I thought I’d try to veganize the fruit pizza I always loved as a kid.

I found this amazing chocolate chip cookie dough recipe that I used for the base of the pizza. Instead of pouring into a pie pan like the recipe says, I just poured it onto a round pizza pan and kept the baking time the same. I used 1/2 cup less sugar than called for in the recipe. Don't worry about over baking the dough, since the cookie is going to be topped with pudding and fruit, it needs to be extra crisp. Allow the cookie to cool completely before topping (I made mine the night before and let it sit on the counter all day to cool and dry out a bit).

I was initially worried when I saw how runny the batter was, but it ended up working out.

Since the batter is so runny, it ends up spreading out on the pan on its own.

I found some instant vanilla pudding mix at the grocery store that had all vegan ingredients. I subbed in almond milk for whole milk and added ½ cup less milk than called for. I also added 1 tsp vanilla extract and 1 Tbsp Bob’s Red Mill egg replacer powder to the mix. I boiled it for 5 minutes to get the pudding extra thick, then let it chill in the fridge for 2 hours.

This is the instant pudding I used.

Right before we headed over to dinner I topped the cookie with the pudding and chopped fruit (I used about ½ pkg of strawberries and 3 kiwis for this pizza).

 My pudding had a lot of lumps, but you can't really tell once all the fruit is added.

Pretty pizza...

This is a very yummy dessert and is great for summer. It tasted just like I remembered as a kid, but I definitely have to wait for special occasions to make it - otherwise Zach and I will eat the whole thing in one sitting.

Thursday, April 24, 2014

Thursday Travel Tales: Scotland Trip

Zach and I spent a summer studying abroad in college (that’s actually how we met). We traveled all over Europe on that trip, but for this post I’m going to focus on our trip to Scotland. For this particular portion of the trip, Zach and I were staying at Oxford University in England attending classes. We got the weekends off though so we could travel anywhere we wanted. For this particular weekend we thought it would be really cool to realize our dream of taking an overnight train. I’ve never been on those sleeper car trains you see in the movies so I thought this would be a good chance for that. Also, we had the rail pass so we didn’t have to worry about buying tickets in advance.

Quick note: at this time in my life I was 19, and my planning skills weren’t very well honed, so I would say our plan for this weekend trip was rough at best. The plan was to take the train as far north as we could get. Then it would be nighttime, and we’d ride the train back to London. We wanted to get as far away from London as possible so that the train ride back would be about 6 hours. We assumed that since the train was going to be riding at around midnight, it would magically be a sleeper train. Also, we made this whole plan without checking any train schedules. Zach had seen a midnight train to London on the schedule once, so we assumed all cities in the UK had midnight trains heading to London. Crazy, I know.

So on Saturday morning Zach, his friend Varun, and I boarded the train from Oxford to Edinburgh. We spent the day walking around the city of Edinburgh, which was nice, but all I really remember from that part of the trip is that we tried to go on a hike outside the city, but then it started pouring down rain and we were stuck on an exposed trail in skimpy ponchos getting attacked by rain and wind. We made our way back to the city and the rain eventually stopped, but by that point the cold had set in, so we were soaking wet and freezing. Also, for some reason by the time we got back to the city everything was closing, so there weren’t many places for us to go inside to get warm. (I remember there were a few restaurants open but they were too expensive for us.) We managed to get cheap pizza from one place before it closed, then we had to eat it outside on the cold street. By this point we were wet and cold and ready for our awesome sleeper train experience.

Since our plan was to get as far north as possible, we took another train to Aberdeen. We arrived to the city safely, then checked the schedule for the next train - it was leaving at 5:30am the next morning. Uh oh. 

At this point we started to realize that checking the train schedule ahead of time may have been a good idea. Sleeper trains are actually a rare thing and I think you can only find them on certain routes. Also, I'm pretty sure you have to purchase those tickets in advance and can't just use a rail pass.

So we got kicked out of the train station since it was closing, and we found ourselves stuck in Aberdeen for a night, which is a super small city with a pretty sketchy night life. We felt uneasy staying in the city near the night clubs, so we headed to the beach to sleep. I mentioned earlier that we were too cheap to go inside a restaurant in Edinburgh to get warm, so paying money for a hotel was definitely out of the question (which is CRAZY! How expensive could it have been? We would have been splitting it three ways, so I bet the hotel would have been $50 max). Anyway, we tried sleeping on the beach because we thought that would be pretty glamorous, but it was SO COLD (remember, we’re still damp at this point and the northern tip of Scotland is not a warm place). Then we went to a nearby park and I slept inside a tunnel on the playground shielded from the wind while Zach and Varun slept cuddled together nearby. In the night some youths came by (I think it was a drug deal), so we tried to stay hidden. We did end up making it to the morning alive.

We took the next train we could to London and then slept a ton on Sunday to make up for our terrible night’s sleep before classed started back. So here's the morale of the story: (1) ALWAYS check public transportation schedules before your trip, especially if the purpose of your trip revolves around said public transportation (2) splurging for a hotel is always a good idea, sleeping outside like a hobo is not fun (3) northern Scotland is a weird place, it's freezing in the summer and the sun never sets at night.

Here are some pictures from the trip:

The group in our ponchos. We're still smiling because it hasn't started raining yet.

Here are Zach and Varun sleeping on the playground. You can also see the edge of the tunnel I was crouched in trying to avoid the wind.

This is at about 4:30am after a rough night's sleep. I'm very excited that the train station is almost open.

Wednesday, April 23, 2014

We can do it Wednesday!: Fruit for Dessert Update 1

So last week I set a goal for myself to try to stick to eating just fruit for dessert for a week. I’m usually a pretty healthy eater, but lately I’ve been a little stressed and anytime that happens I switch into this mode:


I always have a green smoothie for breakfast, and at work I’m usually too busy to eat anything besides my packed lunch, which is always homemade hummus, veggies, and a piece of fruit. Then once I get home I eat our previously planned healthy dinner.  Then I convince myself that I’m dying of starvation and start eating tons of snacks. A typical day’s dessert might include a piece of fruit, a bowl of popcorn, a peanut butter spoon, and a few squares of chocolate. So I know this doesn’t sound so bad, but usually I’m not actually hungry after dinner, so it’d be nice if I could train myself to limit excessive food intake to save on calories and money. So the plan for the week was to stick to just fruit for dessert – here’s how it went:
  
Day 1: Work wasn’t too bad today, so I don’t feel like going home and eating the whole world to feel better, this is good. I ate a big bowl of roasted veggies, salmon, and brown rice for dinner, so I’m pretty full after eating, plus I have to go do errands and don’t have time to think about dessert. Errands are finished, now I have to run to the store to get ingredients for quinoa salad to make for a potluck at work tomorrow. Zach asks me to pick up some dark chocolate peanut clusters for him…argh. I get Zach’s treat, and for myself I pick up a whole watermelon. I eat about 1/3 of the watermelon and it’s amazing. And at this point my belly is too full for me to think about eating anything else. So staying busy and filling my stomach with watermelon worked well for today. I’ll need to keep that in mind for next time.

Day 2: I stuffed my stomach with watermelon again, since it worked so well yesterday. We’re running a half marathon tomorrow so Zach is carbo-loading on bread and cheddar “cheese.” I gave in and had a few slices of bread with “cheese,” but I think running a half marathon is a good excuse for 
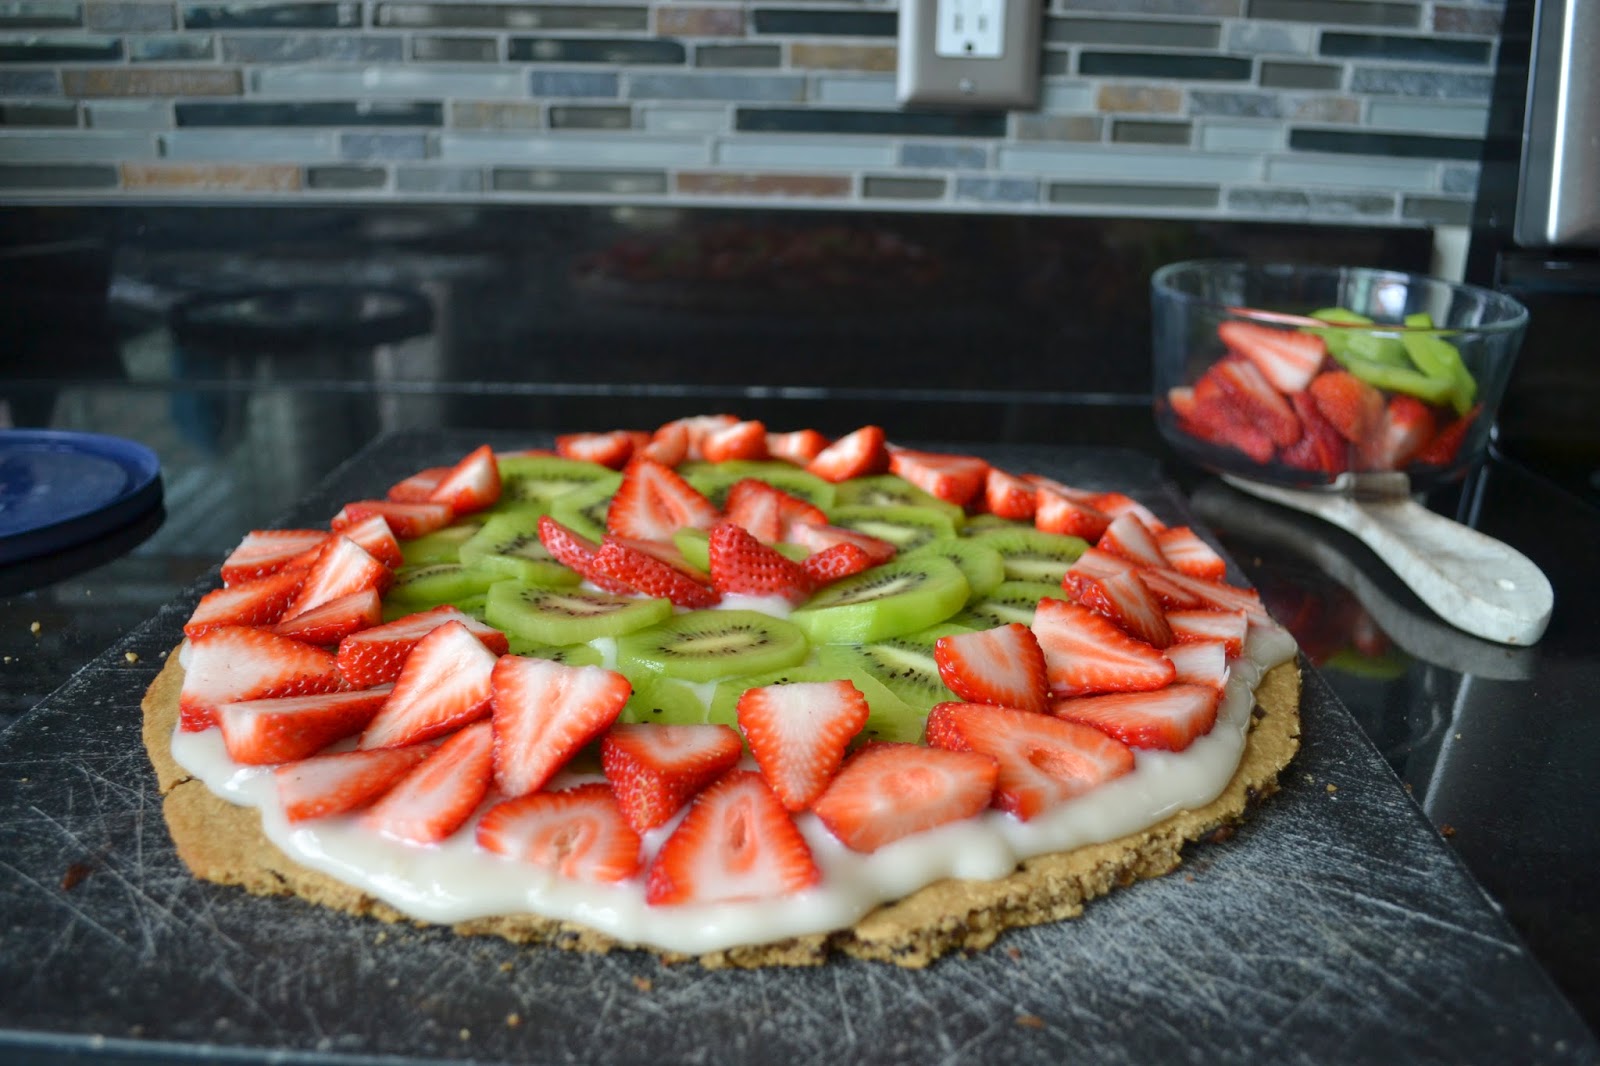
breaking the fruit only rule for now. I have to make this large cookie cake for a dinner party tomorrow and I have extra chocolate chips. Uh oh. I ate a handful of chocolate chips while baking and licked the spoon from the bowl, but I guess it could have been worse, plus I still have the half marathon excuse.

Day 3: Okay, so my goal went out the window today, but I’m going to go ahead and use the half marathon as an excuse – since I rarely run that long of a distance. Also, I went to a dinner party with my large cookie cake (which turned into a fruit pizza) and ate a slice while we were there. This was unavoidable since I brought the dish, so it would have been super weird not to eat it. No worries, this is just a minor setback, plus there was fruit on top of the cookie, so it technically still counts as fruit for dessert.

Day 4: I was doing so well today until Zach insisted on buying Easter candy when we were at the store! He did have a good point though. Easter only happens once a year which makes Easter candies a precious commodity, so we have to take advantage while we can. I got a small bag of milk chocolate eggs (not vegan and not fruit, oops). But other than that slip up I stuck to the plan today.

Day 5: So it’s Monday and I’m planning to stay on track today. After dinner I finished the rest of my watermelon then went to the gym. 
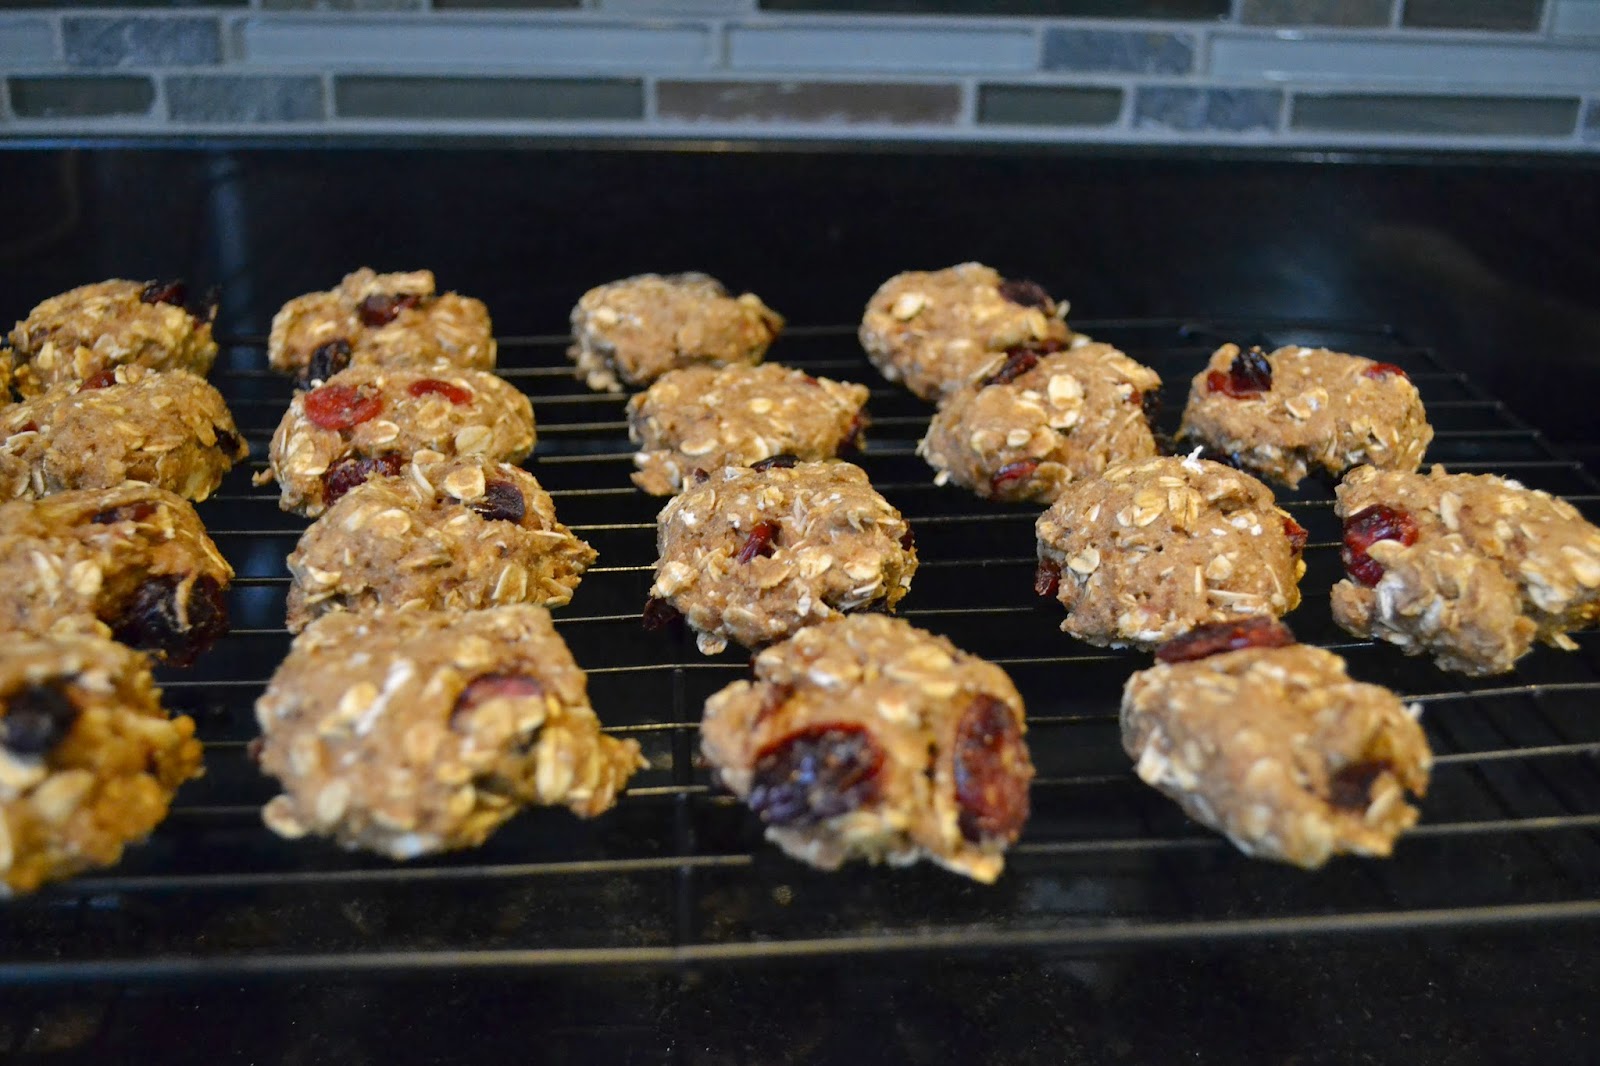
After the gym I was super hungry though, and ended up eating ants on a log (celery, peanut butter, and raisins). I would have eaten fruit but we didn’t have any more in the house, so I have to stock up better in the future.

Day 6: After work Zach gave me some candy he got from a meeting (argh, he is really interfering with my goal). I ate the candy in the car, but reasoned that I wasn’t eating it for dessert, so I’m still in the clear. After dinner I had to go to the grocery store so I got another watermelon. I ate the yummy watermelon, but then I was bored so I made myself some popcorn later.

Okay, so as you can see I did horribly! I only completely met my goal on the first day. So I’m going to try again this week, this time with a few modifications to help things go a little smoother:

1.       Tell Zach about the plan: So Zach unknowingly sabotaged my efforts on Day 2, 4, and 6. This time I’m going to let him know what’s going on so he doesn’t continue to offer me delicious treats.
2.       Wait 1 hour after dinner for dessert: So I usually eat dinner really early (between 5:00-5:30pm). The problem though is if I eat dessert right after dinner, that leaves me with 4-5 hours of no eating time, which is probably fine, but it makes me feel restricted, which leads to snacking. So this week I’m going to plan on waiting one hour minimum before eating dessert. This will give me time to digest, workout, and prepare an elaborate fruit dessert on the days I’m feeling fancy.
3.       Stock fruit: This should have been a no-brainer, but I didn’t stock much fruit in my house last week because there is a grocery store mere feet from our front door. It turns out that after I’m inside, I don’t like to go back outside, so it’s best if I just stock the house with fruit in advance rather than relying on myself to be in the mood to go to the store to buy fruit after dinner. I'm also going to look for exciting fruit for dessert recipes so I don't just have to eat watermelon every day.


I’m going to work on this same goal with these changes for the next week and I’ll let you know how it goes. Wish me luck!

Tuesday, April 22, 2014

Townhome Tuesday: IKEA Hol Table => Litter Hider

One of the best DIY projects Zach and I have done is the litter box holder we made for our cat Cheetoh. The best thing about this project is that it is super easy - otherwise we probably wouldn't have gone through the trouble. First we just bought the Hol side table from IKEA and put it together like normal. Then Zach sawed a hole into one of the sides for Cheetoh to fit into the box. The last step was painting the table. Voila! Check it out:
The top of the table comes off so the litter is accessible for cleaning.

 Here's a silly picture of Cheetoh protecting his scratching post while Zach cleans the litter.

I also added screws to the side so I could attach his scratching post. 

The table blends into the room - no one would guess there was litter in there.

This table is perfect because it has holes in it so the litter can be aired out. It's also just big enough on the inside to fit a litter box and a scoop. And it blends easily into any room since you can paint it whatever color you want.

That's all for today, have a great week!

Friday, April 18, 2014

Food Friday: Sugar-free Oatmeal Raisin Cookies

I made this recipe a few days ago because I was craving something a little sweet after dinner (this was before the only fruit for dessert goal) but have also been trying to avoid refined sugar lately. These cookies are pretty good. They’re not very sweet and taste a little more like a breakfast food than a dessert food, but if you’ve been trying to cut back on sugar lately, definitely give these a try.

Oatmeal Raisin Cookies
Sugar-free, low-fat, can be vegan, makes 2 dozen cookies

Ingredients
9 dates
½ cup applesauce
1 cup whole wheat flour
1 ½ cups oats
2 Tablespoons oil
1 tsp vanilla extract
½ tsp cinnamon
¼ tsp nutmeg
1/8 tsp cloves
1/8 tsp allspice
1/8 tsp ginger
¼ tsp baking soda
¼ tsp baking powder
¼ tsp salt
1 egg or egg substitute (I usually use Bob’s Red Mill egg replacer)
½ cup dried cranberries or raisins

Directions
1.       Preheat oven to 350 degrees.
2.       Blend dates and applesauce together to make a paste.
3.       Add paste to large mixing bowl and mix in all ingredients except cranberries.
4.       Stir in dried cranberries or raisins last.

5.       Drop dough onto cookie sheet and press down (cookies will not spread during baking). Bake for 15 minutes.

      Notes: You can leave out the cloves, ginger, and allspice if you don't have those, I just like really spicy cookies. Also, I used dried cranberries in the cookies I made but raisins would work just as well.

      Here they are! I ate 10 right out of the oven (oops). Then Zach finished the rest off over the next two days. I'll probably need to hold off before making these again, or cut the recipe in half next time. 

This is what the date paste should look like.

This is the batter once everything has been added.

Don't forget to mush down the dough because the cookies won't spread out while baking.

Yummy!

Thursday Travel Tales: Car Sleeping at Disney World

Sorry I’m a day late on this post, I got really busy last night, but I’ll do two posts today to make up for it. In this post I’m going to recap Zach and my first trip to Disney World together. During our third year of college in Atlanta, we thought it would be fun to spend a long weekend visiting Disney in Orlando. I had already been to Disney twice while in college, but Zach hadn’t been since he was younger, and I really wanted to show him how fun of a place it can be for adults. We planned out the trip and one of us (I’m not sure who) suggested that we sleep in our car while there to save money on a hotel. Well we were college students and not super excited about spending $100-$200 per night on hotel, so we decided to do it.

Before driving all the way to Orlando, we decided to practice sleeping in the car to see if it was going to be feasible. So the weekend before our trip we got all of our sleeping bags and pillows together and went out to the car. We were doing this in a Honda Accord, and the best way we could manage was with me in the back seat and Zach in the passenger seat with the seat tilted back onto my legs. I’m actually surprised that we ended up moving forward with our plan after that night, because I remember it as one of the worst nights sleeps I’ve ever had. The first problem was that we were in a parking lot shared by 5 fraternity and sorority houses on a Friday night. It was so loud that in the middle of the night Zach drove the car to a parking deck on the other side of campus. This place wasn’t much better because all night long we heard the thundering sounds of cars driving in and out of the deck above us. Despite this unsuccessful foray into car sleeping, we decided to move forward with the Disney trip.

The next weekend we drove down to Florida on Friday and hung around Downtown Disney until it was time to sleep. We decided that we were going to park our car in a Wal-Mart parking lot overnight. We chose Wal-Mart because they had easily accessible bathrooms and were open 24 hours, so it wouldn’t be weird to have a car parked there all night. We went in to the Wal-Mart bathroom to brush our teeth and wash our faces, then settled in for the night. We blocked out all of the windows with sheets and pillowcases for privacy and cracked a window so we wouldn’t suffocate. Despite being scared that someone was going to bother us in the night, we slept okay. It was a little funny because in the morning the car was super fogged up – it was like the scene in Titanic when Jack and Rose get it on in that car in the cargo. Luckily, neither of us had to go to the bathroom in the middle of the night, since that would have been extremely inconvenient. In the morning, we went into Wal-Mart to freshen up for the day and get changed, then went to Disney!

I don’t remember much about the Disney part of the trip (my most vivid memories are about car sleeping) but I do remember that we met a couple at dinner on the last day and when they asked us where we were staying we were too embarrassed to say, so Zach lied and said we had just driven down for the day. I think driving 8 hours each way for a day trip is weirder than sleeping in a Wal-Mart parking lot, but whatever. Well this couple told us that they were camping at the Disney campground for only $40/night. I didn’t even know Disney had a campground! And they said they got access to great shower facilities, all of the Disney transportation system, and the Disney Dining Plan (this was back when the dining plan was only $30/day).  This conversation was disheartening because we found out for just $80, we could have slept in our car on Disney property for two nights and had access to real showers instead of stinky Wal-Mart sinks. Also by staying on property we wouldn’t have had to pay for parking, which was $20/day, and we could have gotten a meal plan which would have saved us about $20/day. So it turns out sleeping in our car to save money could have been completely avoided. Oh well…


The trip was still amazing. Zach and I stayed there two nights and went to every park. Luckily the weather was perfect (it was November) and we didn't sweat much, otherwise not having showers would have been a big issue. We loved it so much that we ended up going back there for our Honeymoon.  Here a few pictures from the trip. Unfortunately no pictures of car sleeping.

Waiting for the park to open

Epcot is by far my favorite

Foreshadowing! Zach and I ended up buying these and wearing them around two years later when we came back for our honeymoon.

Zach's not very excited. He probably didn't appreciate me pressuring him to try it on since we weren't engaged yet.

 Our first time on Segways! I didn't like it much, but afterwards Zach said he was seriously considering buying one - I hope that was a joke.

The castle looked gorgeous all lit up.

Still smiling, even though we were a little sore and smelly.


Wednesday, April 16, 2014

We can do it! Wednesdays: exercise goal update 2

I set a goal at the beginning of the month to exercise 2 days per week with strength training plus 2.5 hours per week of vigorous activity. This was way harder than I thought it was going to be. I’ve been at it for two weeks and at the end of both weeks I found myself working out like crazy on the weekends to make up for what I had neglected to do during the week in order to meet my goal. For examples, this past week I met my goal by doing BodyPump on Monday and Wednesday and then 50 minutes of cardio each on Friday, Saturday, and Sunday.

During the week I get weary after work and instead of going to the gym to relieve stress, all I want to do is hang around the house and eat. I’m going to try these three things for next week to help motivate me to go to the gym on Tuesday and Thursday nights:

1.       Pack a snack to eat at work at around 4pm – this will keep me from feeling like I’m starving once I get home. That way I can go straight to the gym after work instead of eating dinner first, then waiting until after I digest everything to go out to the gym. At that point I have usually talked myself out of going already.
2.       Leave gym clothes out in the morning so they’re ready when I get home – this one seems lame, but I think it will help me. Usually I’m so beat after work that the last thing I want to do is more chores once I get home (on top of cooking dinner). So having my clothes all picked out and my towel and water bottle ready will help me get ready for working out the second I get home without encountering too many distractions.
3.       Limit mid-week dinner prep – lately I’ve been slacking on my weekend cooking duties, which means I need to go shopping for groceries and cook our dinners for Wednesday-Friday during the week. These added chores always give me a great excuse to skip the gym, so I’m trying to focus on getting all meals prepped before the week starts. I’m also working on making double batches of all of our meals and freezing half of them to make dinner prep easier in the coming weeks.

I’m going to try these this week and see how it goes. Also, for next week I’ll report on my progress on a new health goal (only eating fruit for dessert). This is super difficult for me because I have a huge sweet tooth and like to end the day with a yummy treat. I am currently eating dark chocolate AND some cookies that I made last night, so I’m going to go ahead and set the start date for this goal to tomorrow.


Have a great week. Good luck with your health goals!

Tuesday, April 15, 2014

Townhome Tuesday: Beautiful Black Doors

Yay! It’s Tuesday! I want to dedicate today’s post to the five doors on my second floor that I painted black (actually we paid someone else to paint them black; otherwise they probably wouldn’t look so nice). Last year Zach and I had our entire house painted because we were sick of our blah cream walls, and while I was searching for paint colors online I came across a few pictures of black doors in other people’s houses and I fell in love. I showed the pictures to Zach but he was hesitant, and I don’t blame him. It’s hard to tell whether a certain style will look good in your home and we weren’t sure if drawing attention to our doors was necessarily a good thing. We also weren't sure what wall color we should choose to match our black doors. Well in the end we just decided to go for it and we painted all of the doors on our main level black and we painted the walls grey (light grey on the long walls and two shades darker on the short walls). The result was amazing! Take a look:

I like how the doors contrast with the white trim.

Here you can see the wall colors too. We picked a darker grey for the end walls to make the room seem less narrow. Say "hi" to our cat Cheetoh!


We saved money by having the painters only paint half of the door - this also means they didn't have to take the doors off to paint. This works for us since all of the doors on our main floors remain closed, otherwise you'll want to paint both sides.


If you’re on the fence about painting your doors, don’t worry, just paint them and you’ll like it. It only cost us $30/door, so it's not a huge financial investment. Black is great for a modern, sophisticated look and goes well if you have black accents in the room. Other colors would work too though; I’m thinking about paint our upstairs doors grey or brown for a more muted look next. Also, the doors are no harder to clean than they were before, in case you were wondering.

That's all I have for today, have a great week!

Friday, April 11, 2014

Food Friday: Salmon Pizza

I have a very special recipe to share today. Zach and I had an idea to make a salmon pizza last week and it turned out to be one of the best meals I’ve eaten all year – no joke. This pizza tastes so gourmet, rich, and delicate at the same time. If you like salmon and lox bagels, you’ll love this.

There are two ingredients that really make this pizza, great quality salmon cooked to perfection and an amazing cashew cream cheese I found on this site. I made half this cream cheese recipe, then added 1 large clove of roasted garlic plus ~½ cup of steamed cauliflower to the food processor with the "cheese." After that I just assembled the pizza with the following ingredients.

Salmon Cream Cheese Pizza
dairy free, oil free, makes 1 pizza

1 pkg whole wheat pizza dough from Trader Joe’s
1-2 Tablespoons fresh dill, chopped
¼ - ½ red onion, diced
½ tomato, cut into thin slices
½ lemon, cut into thin slices
1-2 Tablespoons capers
½ recipe cashew cream cheese + 1 clove roasted garlic + ½ cup steamed cauliflower
6 oz salmon, half-way cooked, then shredded with two forks
1 cup spinach, roughly chopped

1. Roll out dough and put in a lightly greased pizza pan. Spread cream cheese sauce onto dough.
2. Broil salmon about 4 minutes on each side, then shred with two forks.
3. Top pizza with dill, onions, tomato slices, salmon, lemon slices, capers, and spinach.
4. Cook at 425 degrees for 15 minutes. Remove lemon slices before eating.

 This is the dough I use from Trader Joe's for every pizza we make. So yummy and ready to go!

Here's the pizza after I loaded it with toppings.

Fresh out of the oven!

Even though this meal is incredibly delicious, the pizza is really rich and a bit too calorie dense to be in our normal meal rotation. If you’re interested in cutting down the calories I would suggest the follow changes:

1. Use half of the TJs dough and make a thin crust pizza. You can stretch this into two nights of pizza as long as you double the amount of the rest of the toppings. You may need to eat it with a fork and knife this way, but it will still taste great.
2. Use half the amount of the cashew cream cheese (1/4 of the recipe) and add in more steamed cauliflower to increase the amount of sauce.


That’s all I have for now, have a great weekend and I hope you enjoy this pizza as much as we did.

Thursday, April 10, 2014

Thursday Travel Tales: Austin Part II

Last week I went over our thrilling, not-so-festive Christmas night spent in Austin. The next day was much more enjoyable thanks to Zach. His Christmas gift to me was a scavenger hunt that took us all around the city. He doled out clues to me, then I had to solve them without using my phone and once I made my way to the correct location, he would hand me the next clue.  When Zach gave me the first clue on the plane I was a brat and said “Awesome, do these lead to some big gift?” And his face fell and he said, “Oh, no. This is the gift…” Oops. This gift did end up being awesome and I’m so impressed that he was able to put together the whole thing without ever having visited Austin. Here are the places I was led to:

1. I got my first clue on the plane, and it led me to this baggage claim area with all of these guitars. The clue said I had to act like a rock-star (instead I acted like an insane person).

2. The following morning I got ready for a day of biking around Austin looking for the rest of my clues. It started out frigid!

3.  My second clue led to this cool mural that looks like a postcard. I have no idea how Zach found this place using only the internet.

4.  Here’s a statue of Stevie Ray Vaughn in some park. I’m still really cold at this point and wondering who this is a statue of.

5.  The next stop was to the former French Embassy to the Republic of Texas. 

6. Then I had to find the clock tower at UT Austin. My only clue was to go to the north of the city and look for red roofs, then find a gold clock – so I’m lucky I happened upon this fairly quickly.

7. I needed Zach’s help to get to this next place, which was a museum on UT’s campus that housed a copy of the Gutenburg Bible. They also had the first photograph, which looked like a black piece of paper.

8. Next I found this huge star in front of the Texas History Museum.

9. Lunchtime! Going to Whole Foods Headquarters was definitely the highlight of the trip for me.

10. Walking from Whole Foods I found this tree which is called the Treaty Oak. It was a former meeting place for some Native American tribes and has been named “the most perfect specimen of a North American tree.” I wonder how many other things have been named “the most perfect specimen” of their kind. Is that title given often?

11. After the tree I walked over to Book People where I got to pick out anything I wanted. I bought a pretty travel book for our coffee table, but I actually got it from Amazon.com a few weeks later because it was cheaper there, but the intent to buy me any book I wanted was what counted anyway.

12. The capitol was next. We went inside and checked out where the House and Senate meet and walked to the very top. It was very impressive, which is not unexpected for such a large state.

13. The last stop was a miniature train ride at Zilker Park. We were definitely the only people on it without kids, but it was still entertaining.

After a day of solving clues, we headed back to our rented studio apartment and did a jigsaw puzzle, cooked dinner, and watched Orange is the New Black on Netflix (this show is the opposite of Chirstmasy).
That’s it for our Austin trip. We did spend one more day there but all we did was walk an insane distance to pick up our rental car, visit Whole Foods three more times, cook exciting meals, and watch the Hobbit at a brewery/cinema place. Then we drove the car (I ended up getting us a free upgrade to a Mustang) to San Antonio.

In San Antonio we tried to ride bikes around like we did in Austin, but found out quickly that the streets in San Antonio are way too narrow for that. We just walked around downtown instead and discovered the River Walk, which is insanely cool. Besides the River Walk though, we found San Antonio to be super lame so we spent most of our time there chillin’ in our apartment watching movies and doing puzzles.


That sums up the Texas trip. I’m so lucky to have Zach who made this trip so special and memorable for me. We’re planning a trip to Portland and Seattle for this summer and I’m trying to put together a scavenger hunt for him while we’re there but it’s so much harder than I thought it would be. It’s difficult to estimate how long everything will take and you have to hope that certain attractions will be exactly where the internet says they will be so that your clues don’t lead to the wrong place. So special kudos to Zach for pulling it off! 

Wednesday, April 9, 2014

We can do it! Wednesdays: exercise goal update 1

Last week I set a goal to meet the CDC weekly physical activity recommendations required for “even greater health benefits” for adults. The requirement is two days of full body strength workouts + 2.5 hours of vigorous aerobic exercise. Last week I came so close to meeting this goal, but I only managed to fit in 2 days of strength training + 2 hours of vigorous activity. This week I’m really going to try to fit in that extra half hour so I don’t have to report another failure in the next Wednesday post.

One reason this goal is pretty attainable for me is that I’ve already been in the habit of doing full body strength workouts twice a week by going to Les Mills BodyPump classes. Zach and I discovered BodyPump two years ago and have been going 2-3 times per week since. This class is amazing and I encourage you to search for a class near you right now and try it out. It’s a barbell class that works out your whole body in an hour with ten tracks set to music (1 warm-up, 2 squats, 3 chest, 4 back, 5 triceps, 6 biceps, 7 lunges, 8 shoulders, 9 core, 10 cool-down). The class is challenging but fun and the tracks are set to great music. I especially like being able to go to the gym for just an hour and leave with my whole body worked out without having to fight for dumbbells or machine time. If you have trouble fitting in full-body strength work outs or you're not even sure what exercises to do, you should out try a class like this – it’s the only way I’ve been able to motivate myself to keep up with strength training. Also, if they don’t teach BodyPump at your gym, look for other strength training group classes – there are probably a few classes like this that go by different names.

Good luck with your goals this week! I’ll be back next Wednesday with some thoughts on the cardio half of this goal.

Tuesday, April 8, 2014

Townhome Tuesday: DIY Paint Chip Calendar

If you’re a Pinterest user I’m sure you’ve seen calendars that crafty people have made from paint chips. For this installment of Townhome Tuesday I wanted to go ahead and share my version of the paint chip calendar and show you that even if everything isn’t perfectly cut and centered, the end result can still be cute and useful.

The rainbow colors turned out nicer than I thought.

1.       I started with a cheesy floating glass frame that said “Home is where the heart is” or something like that with a ribbon glued on it. I bought it from Kohl’s for less than $10 because no one else wanted such a lame-o sign, but I saw the hidden beauty behind it. I could tell the frame and glass were nice, and I assumed that I’d easily be able to take the thing apart and make a paint chip calendar out of it.
2.       Almost two years pass and the frame remains tucked away in a closet.
3.       A few weeks ago, I finally got the urge to complete the project. My first stop was Lowe’s where I went through every available paint sample color and chose seven main colors (for the days of the week) and within each color I chose five color shades (for the rows of weeks). My original plan was to stay with one color for the whole calendar, but I wasn't able to find 35 shades of one color to make that work, so I went with a rainbow theme instead.  I grabbed the big paint chips instead of the strips that have 5 colors on them so that I’d have plenty of “material” to work with once I got home. I also grabbed 3-4 samples of plain white for the month and weekday fields.
4.       Once I got home, I started un-assembling the cheap-o frame. This actually was more difficult that anticipated, so I got the husband involved. I also put him to work pulling off the tacky ribbon and wiping the glass with goo-gone.
5.       I measured the glass and then used a paper cutter to cut each square to the correct size – I practiced with one row of plain paper to verify my math before cutting all of the paint chips. Note: If you don’t have a paper cutter, don’t do this project. It will be so frustrating with scissors and would probably turn out looking too messy anyway. Just try to borrow one from a friend or co-worker (there’s at least one crazy scrapbook lady at every work place).
6.       Once the squares were cut, I placed them on one of the panes of glass and secured them with a little tape on the back. After a lot of positioning and re-positioning (Zach helped here too) I was ready to put the frame back together.

Here's the view of the back - not so pretty.


7.       Here’s the end result. Sometimes it bothers me that the squares aren’t perfectly straight, but mostly I love it and I admire it all of the time.


Hopefully this inspires you to sift through your pins and finally try one of those DIY projects you tagged a year ago; not all of them will end up on those Pinterest fail blogs...

Friday, April 4, 2014

Food Friday: Mango Salsa Salad

Zach and I have always loved the mango pineapple salsa our friend Jenn makes. Any time we went to a potluck event with her Zach would text her and request that she bring the awesome salsa and chips just for him (side note: Jenn always brought the Whole Foods homemade tortilla chips that you can find in the salad bar area. Not only are these the BEST CHIPS EVER, they go especially well with this dip). Well a few years ago Jenn moved away and the amazing salsa and chips left our lives (we miss Jenn too, but mostly her yummy snack). Right now Zach is in a mango kick, so I thought it would be nice to try to turn this salsa he used to love into a salad for dinner tonight.

I began by making the salsa the night before since letting it sit overnight helps the flavors mix for a more delicious end product. Also, it made dinner prep go by quickly.

All those colors mixed together look so yummy…

I cooked up some taco “meat”  with crumbled tempeh, taco seasoning, and some splashes of soy sauce.

I was hoping it would get crispy, but that didn’t work out – probably because I wasn’t using oil.

I blended half of the mango salsa to make a dressing. You can add pineapple juice reserved from the canned pineapple or water to make it runnier if you want.

The beautiful colors turned into a brown goo, but it was still delicious.

Assembling the salad was easy. I mixed together spinach, black beans, chopped tomato, chopped avocado, the taco “meat,” and the remaining mango salsa. Then I topped it all with the dressing.

I wish I had taken a picture before adding the brown goo – I promise it looked much tastier.

I thought this salad was really easy to put together and yummy. Zach loved the salad too and immediately recognized it as a throwback to the snack he once obsessed over.

Here’s the recipe (I know it has a lot of ingredients, but it’s not that hard to put together, especially if you make the salsa ahead of time):

Manga Salsa Salad
4 servings, vegan, sugar-free, oil-free

Mango Salsa
·         2 mangoes, diced
·         1 20 oz. can pineapple tidbits (drain and reserve juice)
·         Juice from 2 small limes
·         2 jalapenos, diced
·         ½ red onion, diced
·         1 red bell pepper, diced
·         ½ cilantro leaves, chopped
·         1 bunch green onions, chopped

Vegan Taco Meat
·         2 8oz pkgs tempeh
·         Splashes of soy sauce to taste
·         4-6 T Taco seasoning (you can buy this or make your own)

Taco Seasoning (makes about 4 Tbsp)
·         4 tsp chili powder
·         2 tsp cumin
·         1 tsp smoked paprika
·         1 tsp cayenne powder
·         1 tsp oregano
·         1 tsp onion powder
·         1 tsp garlic powder
·         1 tsp salt
·         ½ tsp black pepper

Salad
·         1 can black beans
·         2 handfuls chopped spinach
·         2 tomatoes, diced
·         1-2 avocados, diced

1.       To make salsa - mix all ingredients together in a bowl.
2.       To make taco “meat” - heat crumbled tempeh in a pan on medium heat along with a few splashes of soy sauce, 2-3 tablespoons taco seasoning, and ¼ cup water.
3.       To make dressing - blend half of the salsa together. Add pineapple juice (reserved from can of pineapple tidbits) or water to thin dressing if desired.
4.       To assemble salad - mix spinach, beans, tomatoes, avocado, remaining salsa, taco meat, and dressing together in a large bowl.